Making a Login System for Website 2019 Non Php Updated FREE
Making a Login System for Website 2019 Non Php
How to create a Registration and Login System with PHP and MySQL. Hither is the quick solution to build a login system with PHP and MySQL. Nowadays nigh every website provides Registration and login functionality. Thus, it is necessary to add a login arrangement in modern web applications.
In this tutorial, we walk through the consummate process of creating a user registration system. Users can create an account past providing username, countersign, email. After the account was created, the user can log in to their own account. Once the user login, it volition redirect to the Dashboard page. Moreover, the user can logout from his panel. This whole organisation we are developed using PHP and MySQL.
Furthermore, we volition show y'all how to build secure pages that are only accessed by logged in users. Without login, the user tin can not access the page.
How to create a Registration and Login System with PHP and MySQL
Here are 7 pretty simple steps you take to follow to create a login system.
- Create a Database and Database Table
- Connect to the Database
- Session Create for Logged in User
- Create a Registration and Login Form
- Make a Dashboard Page
- Create a Logout (Destroy session)
- CSS File Create
Create a Database and Database Table
Beginning, you have to log in to PHPMyAdmin. Side by side, click on the Database tab to create a new database. Enter your database proper name and click on create database button. Every bit soon as PHPMyAdmin will create a new database.
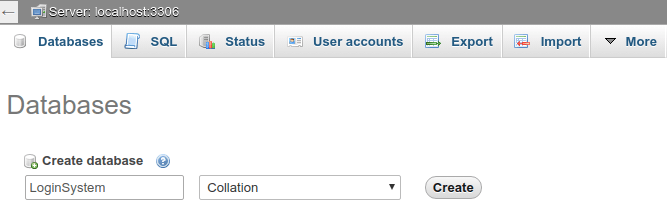
Similarly, you can execute the below query to create a database.
CREATE DATABASE LoginSystem; Once you create a database, the 2nd step to creating a user table. The user's table volition take the following fields.
- id – int(xi)
- username – varchar(100)
- email – varchar(100)
- password – varchar(100)
- create_datetime – datetime
CREATE TABLE IF Not EXISTS `users` ( `id` int(xi) Non Goose egg AUTO_INCREMENT, `username` varchar(50) NOT NULL, `e-mail` varchar(l) Not Nada, `countersign` varchar(50) NOT NULL, `create_datetime` datetime Non NULL, Principal KEY (`id`) ); Re-create the higher up query and execute it in the SQL query area.
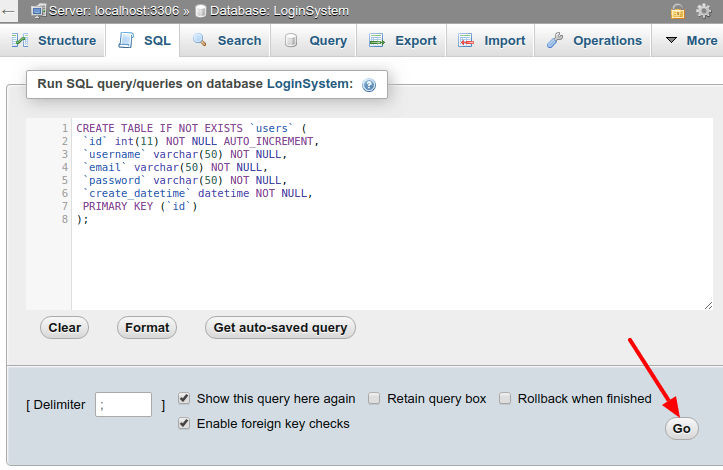
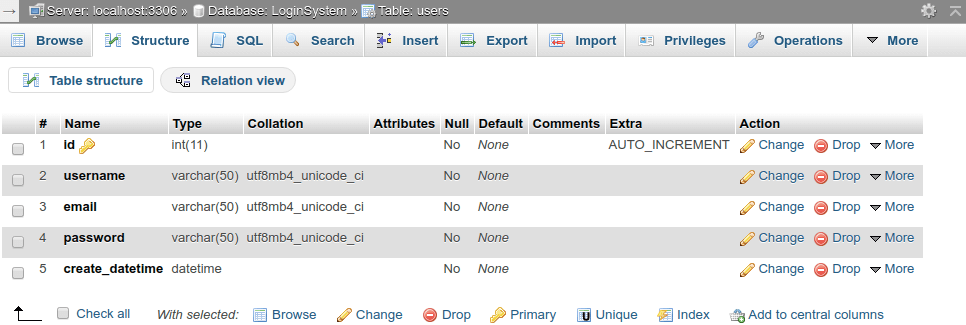
Your database table looks like the below screen.
Connect to the Database
After creating the table, we have to create a PHP MySQL connector script to connect to the MySQL database server. Create a file named db.php and put the post-obit code within it.
db.php
<?php // Enter your host name, database username, password, and database name. // If you have not set database password on localhost then set up empty. $con = mysqli_connect("localhost","root","root","LoginSystem"); // Cheque connection if (mysqli_connect_errno()){ echo "Failed to connect to MySQL: " . mysqli_connect_error(); } ?> Session Create for Logged in User
Adjacent, we have to create a session for the user. Create a file named auth_session.php and paste the codes below.
auth_session.php
<?php session_start(); if(!isset($_SESSION["username"])) { header("Location: login.php"); exit(); } ?> Creating a Registration Form
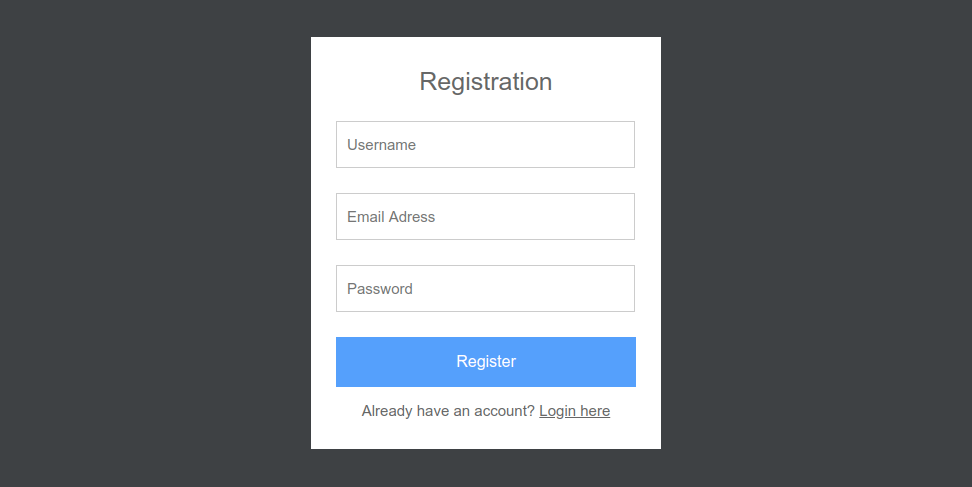
Furthermore, create PHP file registration.php and paste the following example code in it. This will create an HTML form. It volition permit users to annals.
registration.php
<!DOCTYPE html> <html> <head> <meta charset="utf-eight"/> <title>Registration</title> <link rel="stylesheet" href="style.css"/> </head> <trunk> <?php crave('db.php'); // When form submitted, insert values into the database. if (isset($_REQUEST['username'])) { // removes backslashes $username = stripslashes($_REQUEST['username']); //escapes special characters in a string $username = mysqli_real_escape_string($con, $username); $electronic mail = stripslashes($_REQUEST['e-mail']); $email = mysqli_real_escape_string($con, $email); $password = stripslashes($_REQUEST['countersign']); $password = mysqli_real_escape_string($con, $password); $create_datetime = date("Y-m-d H:i:s"); $query = "INSERT into `users` (username, countersign, e-mail, create_datetime) VALUES ('$username', '" . md5($password) . "', '$email', '$create_datetime')"; $effect = mysqli_query($con, $query); if ($issue) { echo "<div class='form'> <h3>You are registered successfully.</h3><br/> <p class='link'>Click here to <a href='login.php'>Login</a></p> </div>"; } else { echo "<div form='form'> <h3>Required fields are missing.</h3><br/> <p class='link'>Click here to <a href='registration.php'>registration</a> again.</p> </div>"; } } else { ?> <class grade="form" action="" method="postal service"> <h1 course="login-title">Registration</h1> <input blazon="text" class="login-input" name="username" placeholder="Username" required /> <input type="text" course="login-input" name="e-mail" placeholder="E-mail Adress"> <input blazon="password" course="login-input" name="password" placeholder="Password"> <input type="submit" name="submit" value="Register" class="login-push"> <p form="link"><a href="login.php">Click to Login</a></p> </form> <?php } ?> </trunk> </html> The output of the above code will look like this.
Creating a Login Class
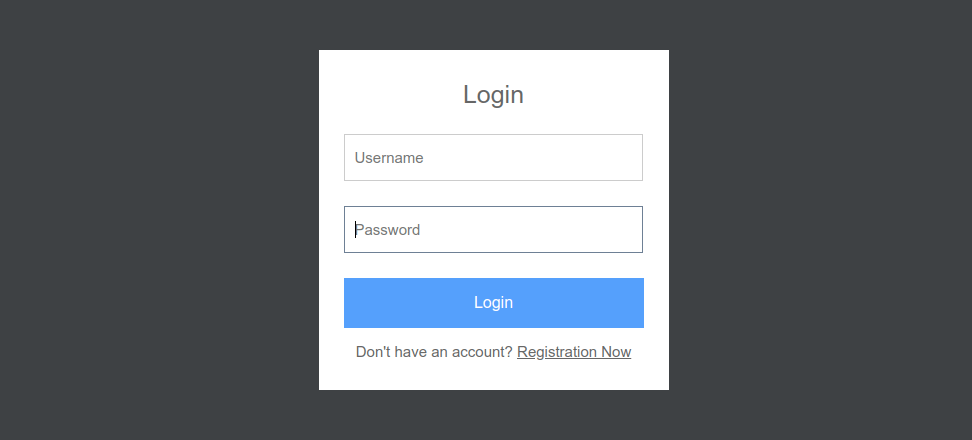
Similarly, create a PHP file login.php and put the following example code in it. This file code contains a form that allows users to enter username and password.
login.php
<!DOCTYPE html> <html> <head> <meta charset="utf-viii"/> <title>Login</title> <link rel="stylesheet" href="style.css"/> </head> <body> <?php require('db.php'); session_start(); // When form submitted, check and create user session. if (isset($_POST['username'])) { $username = stripslashes($_REQUEST['username']); // removes backslashes $username = mysqli_real_escape_string($con, $username); $password = stripslashes($_REQUEST['password']); $password = mysqli_real_escape_string($con, $countersign); // Bank check user is exist in the database $query = "SELECT * FROM `users` WHERE username='$username' AND password='" . md5($password) . "'"; $outcome = mysqli_query($con, $query) or die(mysql_error()); $rows = mysqli_num_rows($result); if ($rows == i) { $_SESSION['username'] = $username; // Redirect to user dashboard folio header("Location: dashboard.php"); } else { echo "<div class='form'> <h3>Incorrect Username/password.</h3><br/> <p form='link'>Click hither to <a href='login.php'>Login</a> again.</p> </div>"; } } else { ?> <form class="form" method="post" proper name="login"> <h1 class="login-championship">Login</h1> <input type="text" class="login-input" proper name="username" placeholder="Username" autofocus="truthful"/> <input type="countersign" form="login-input" name="password" placeholder="Password"/> <input type="submit" value="Login" name="submit" class="login-push button"/> <p form="link"><a href="registration.php">New Registration</a></p> </course> <?php } ?> </torso> </html> Similarly, the output of the above code will expect like this.
Making a Dashboard Page
Once user login we will redirect to the user dashboard page. Create a PHP file named dashboard.php and paste the beneath code in it.
dashboard.php
<?php //include auth_session.php file on all user panel pages include("auth_session.php"); ?> <!DOCTYPE html> <html> <head> <meta charset="utf-viii"> <title>Dashboard - Client area</title> <link rel="stylesheet" href="style.css" /> </head> <trunk> <div form="form"> <p>Hey, <?php repeat $_SESSION['username']; ?>!</p> <p>You lot are now user dashboard page.</p> <p><a href="logout.php">Logout</a></p> </div> </body> </html> Later the user login, you will see the post-obit user dashboard screen.

Similarly, you lot tin create some other secure page. Only you demand to add the below code first in your PHP file.
<?php require('db.php'); include("auth_session.php"); ?> Create a Logout (Destroy session)
When clicking on the logout button we have to destroy user sessions. Information technology volition redirect to the login page. Thus, create a file named logout.php and add the below code.
logout.php
<?php session_start(); // Destroy session if(session_destroy()) { // Redirecting To Abode Folio header("Location: login.php"); } ?> CSS File Create
Finally, important step for a user experience perspective. Create CSS file style.css and put the below code.
style.php
body { background: #3e4144; } .class { margin: 50px auto; width: 300px; padding: 30px 25px; groundwork: white; } h1.login-title { color: #666; margin: 0px auto 25px; font-size: 25px; font-weight: 300; text-align: center; } .login-input { font-size: 15px; border: 1px solid #ccc; padding: 10px; margin-bottom: 25px; height: 25px; width: calc(100% - 23px); } .login-input:focus { edge-color:#6e8095; outline: none; } .login-push button { color: #fff; groundwork: #55a1ff; border: 0; outline: 0; width: 100%; height: 50px; font-size: 16px; text-marshal: eye; cursor: arrow; } .link { colour: #666; font-size: 15px; text-marshal: center; margin-lesser: 0px; } .link a { color: #666; } h3 { font-weight: normal; text-align: centre; } Finally, our login system is ready to use. You tin download the source code from the beneath download link.
Final Thoughts
That all you lot demand to know how to create registration and login system in PHP with MySQL database. Furthermore, we create a registration and login form. Moreover, we create a MySQL connection file to establish a database connectedness. Thus nosotros create a consummate login system with interactive pattern.
We promise you take establish this article helpful. Let us know your questions or feedback if any through the comment section in below. You tin can subscribe our newsletter and become notified when we publish new WordPress manufactures for costless. Moreover, you tin can explore here other JavaScript related articles.
Icon made past Kmg Design
Making a Login System for Website 2019 Non Php
DOWNLOAD HERE
Source: https://speedysense.com/create-registration-login-system-php-mysql/
Posted by: duggermorningard.blogspot.com